Learn practical techniques for improving control and consistency
Gas tungsten arc welding (GTAW) has a reputation for being one of the most unforgiving processes in the shop. It demands hand-eye-foot coordination, control of travel speed and filler metal addition, and exceptional cleanliness. Unlike processes that may be more forgiving of minor surface contamination, GTAW can quickly reveal impurities and inconsistency. Machine settings matter, but consistent results also come from setup, positioning, and disciplined habits developed through repetition. These ten habits give students and developing welders effective ways to build control, consistency, and sound welding practices.
Thorough Metal Preparation
Clean metal is the foundation of a sound GTA weld. Remove oil, rust, paint, heavy mill scale, dross, and other contamination before initiating the arc. Pay particular attention to plasma-cut edges, where hard oxides can remain after cutting. Clean joint surfaces and cut edges to bright metal using appropriate mechanical or chemical methods. Aluminum requires special attention because its oxide layer has a much higher melting point than the base metal and can interfere with weld pool control and fusion. A dedicated stainless steel brush can be used immediately before welding. Good preparation improves weld quality while reducing exposure to fumes from oils, coatings, and other contaminants.
Always Be Comfortable
When learning GTAW, body position should be simple, fluid, and repeatable. Establish a solid brace before the arc is initiated and perform a dry run along the joint. This lets you check torch angle, wrist movement, lead slack, and clearance before adding heat and glare. For beginning torch-control exercises, start with short-fused beads and focus on steady movement. Anchoring the torch wrist and using a controlled pivot can help develop repeatable motion before progressing to longer passes. A comfortable position removes unnecessary variables while foundational skills develop.
Watch the Leading Edge of the Pool
The weld pool is where the weld is made. Beginners often stare at the finished bead behind the tungsten, causing them to lose control of travel speed or drift from the joint. Instead, focus on the leading edge of the weld pool and the joint ahead of the tungsten. This provides feedback about fusion, tie-in, travel speed, and joint alignment. A useful exercise is tracing winding or irregular lines on a plate, forcing the welder to actively steer the pool. As control improves, the finished bead becomes the result of what the welder sees and controls at the front of the pool.
Consistent Arc Length and Torch Angle
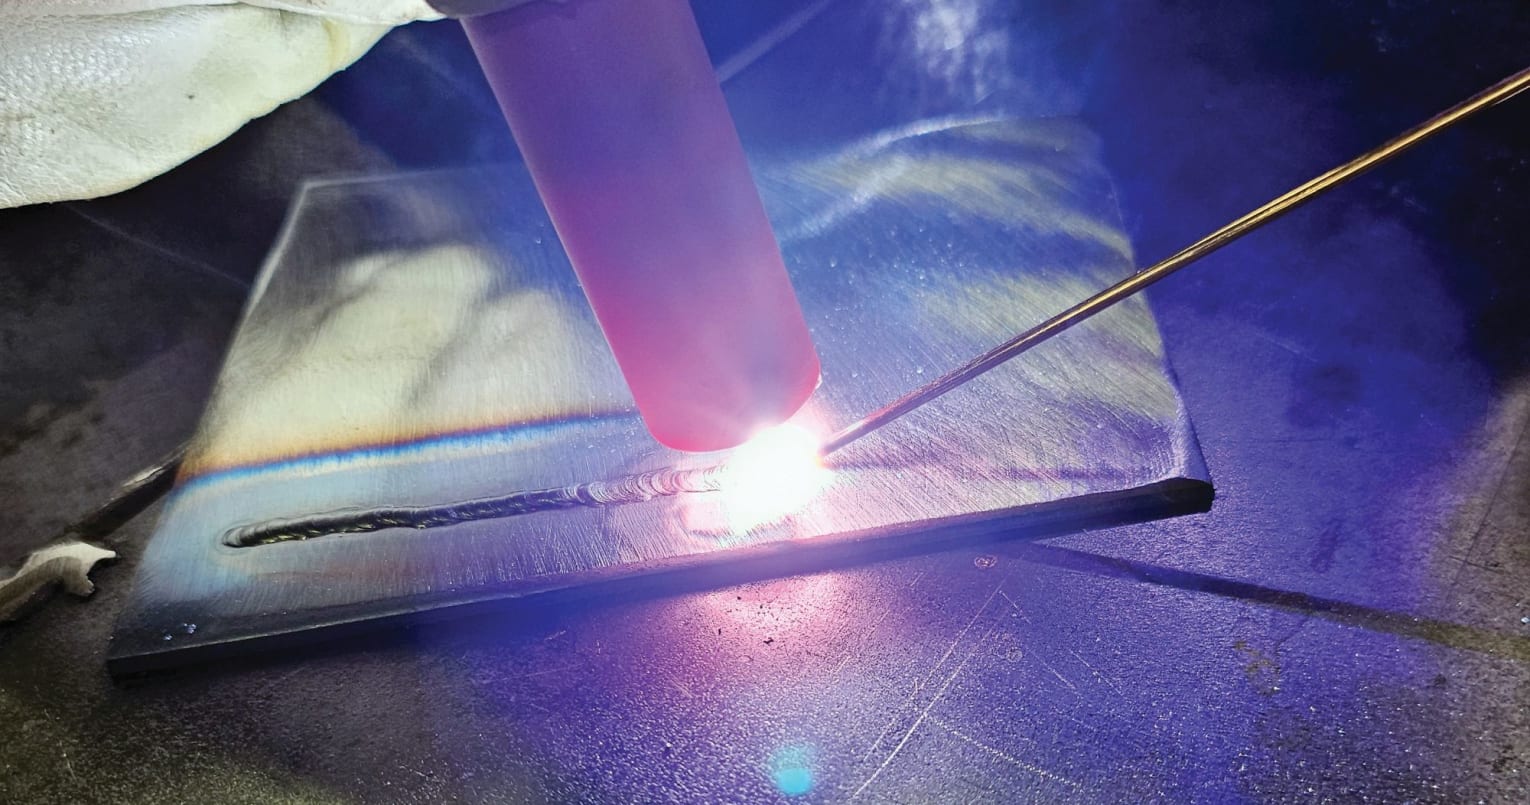
A consistent arc length is critical to controlling heat input and bead width. A practical starting point is an arc length approximately equal to the tungsten diameter. Maintain a controlled torch angle, generally around 15 to 20 deg in the direction of travel. Excessive arc length or torch angle can spread the arc and reduce heat concentration. Tungsten stickout should be selected based on the cup and shielding requirements rather than allowed to become excessive. The goal is simple: Keep tungsten height and torch position consistent from beginning to end.
Feed Filler Rod into the Shielding Envelope
Filler technique is more than touching the rod to the pool. Keep the heated end of the filler rod within the shielding gas envelope as much as practical. Pulling the rod several inches away exposes its hot end to the atmosphere and can introduce oxidation and contamination when it returns to the pool. Brace the filler hand when possible and practice feeding the rod through the fingers while maintaining a comfortable relationship between the torch and filler rod. Controlled movement keeps filler delivery consistent and helps prevent premature heating or balling.
Proper Tungsten Preparation
The tungsten electrode is central to arc stability. Grind it lengthwise with a wheel or sharpener dedicated to tungsten rather than grinding across its diameter. Longitudinal grinding produces a consistent electrode surface and helps promote a stable, predictable arc. Tungsten contamination is common when learning GTAW, but welding with a contaminated tungsten electrode teaches the wrong lesson. If the tungsten touches the pool or filler metal, stop, remove the contaminated portion, and regrind it. The extra time is worthwhile because students need to be repeatedly exposed to what a clean, stable arc and weld pool should look like.
Amperage Control and Heat Management
A useful starting guideline is approximately one amp per 0.001 in. of material thickness. For example, 1/8-in.-thick material suggests a starting point near 125 A. This is not a universal setting; material, joint design, and technique affect the final amperage. When using a foot pedal, additional amperage capacity can provide headroom for quickly establishing the weld pool. The welder can then adjust the current to maintain the desired pool size and travel speed as heat builds in the workpiece. At termination, taper the current gradually rather than abruptly releasing the pedal when the equipment and procedure allow current control.
Shielding Gas and Weld Termination
GTAW depends on continuous shielding of the tungsten, weld pool, and cooling weld metal. Excessive gas flow can create turbulence and reduce shielding quality, so use a flow rate appropriate for the cup, gas lens, and welding environment. At the end of the weld, do not immediately pull the torch away from the hot crater. Hold the torch in position while postflow continues to protect the tungsten and weld area. Add a final small amount of filler metal while tapering the heat to help fill the crater and reduce termination defects. Postflow requirements vary with current, electrode size, cup, and machine setup.
Read the Weld
The finished weld is a record of what happened under the hood. Students can learn to connect bead appearance with their physical actions. Uniform bead width can indicate consistent travel and heat control, while widening toward the end can indicate heat buildup or insufficient travel speed. Ripple spacing can reveal changes in cadence or filler delivery. Undercut may point to excessive heat, a long arc, or torch-position problems. Dull, gray, or contaminated surfaces can indicate excessive oxidation, overheating, or inadequate shielding. Learning to read these visual indicators turns every coupon into a feedback loop for the next pass.
Develop a Rhythmic Cadence and Build Muscle Memory
GTAW requires both hands, the eyes, and sometimes the foot to work together. A repeatable cadence helps coordinate those movements. A simple pattern is travel, pause, dab, repeat. Move forward, establish the leading edge of the weld pool, add filler metal to the front of the pool, withdraw the rod while maintaining shielding, and continue. The goal is not to weld mechanically to a beat but to develop predictable timing and filler delivery. On machines equipped with pulse, low-frequency pulsing can provide a training reference, but it should supplement — not replace — the welder’s ability to read and control the weld pool.
Patience Builds Precision
GTAW should be learned as a progression rather than as a single skill. Start with clean material and a comfortable position. Establish torch control, learn to monitor the weld pool, maintain a consistent arc length, feed filler metal deliberately, and correct tungsten contamination immediately. Then develop heat control, shielding, termination, and rhythm.
The goal is not a perfect weld on the first attempt. It is to make each attempt more intentional than the one before it. GTAW exposes inconsistency, but that is also what makes it valuable to learn. The patience and coordination developed while controlling a GTAW weld pool can carry over to every other welding process.
Slow down. Pay attention. Learn from the weld pool. Make the next weld better.
Reprinted with permission: The AWS Welding Journal
Fig. The proper torch angle and placement of filler rod into the leading edge of the weld pool.